Generate Test Data for ServiceNow.
ServiceNow being one of the best CRM platforms on the cloud, it is highly configurable allowing companies to tailor workflows, screens and so on … One of the most challenging activities while developing on ServiceNow is Data ! In fact, we need Test Data for each development use case. Test Data should not be using production data due to GDPR regulation as well as internal company policies, therefore the need for Synthetic/Realistic Test Data.
In this article we are going to discuss the following:
- What is Test Data Management?
- Key challenges for Test Data Management
- Available options to create test data for ServiceNow
- Creating Test Data with CloudTDMS
What is Test Data management?
Test Data is the key input given to a software program or SaaS solution during Dev & Test phases. Test data is used for both positive testing to verify that functions produce expected results for given inputs and for negative testing to test software ability to handle unusual, exceptional, or unexpected inputs. Test data management is the process of planning, designing, storing, and managing Test Data modeling and workflows.
Key challenges for Test Data Management
Regulatory Compliance
- Over 55% of companies are not fully compliant with Data Privacy Policies due to access to all or subset of production data by development & test teams.
- Impact: GDPR penalties range from 2% of annual revenue or €10 million, whichever is the greater, to 4% or €20 million, depending on the severity of the breach.
Test Data Readiness
- Up to 45% of dev/testing time is spent generating by hand or waiting for test data.
- Impact: Testing Delays as well as increased defects.
Data profiling
- Up to 85% of data is still profiled manually.
- Impact: Delivery Delays, Incomplete/inconsistent data discovery & profiling.
Automation
- Over 70% of test data is still created manually.
- Impact: Delivery delays & Incomplete testing of key use cases, inefficient Dev Ops processes.
Available options to create test data for ServiceNow
- Manual (xls) or Specific development
- Automated tools : Inhouse, on-prem or Cloud
In this article we shall be discussing about
For the second option, we will be using a SaaS based “Test Data Management Solution” : CloudTDMS
Creating Test Data with CloudTDMS
CloudTDMS is a one stop solution for Test Data Management, CloudTDMS automates the process of test data generation for non-production purposes such as development, testing, training, upgrading or profiling. While at the same time ensuring compliance to regulatory and organizational policies & standards. CloudTDMS involves manufacturing and provisioning test data for multiple testing environments by Synthetic Test Data Generation as well as Data Discovery & Profiling.
The process of using CloudTDMS is simple as follows:
Go to CloudTDMS and create a free account (Starter Plan)
Create an Application (ServiceNow in our case)
Create Streams & Attributes. ServiceNow translations
ServiceNow table = Stream
ServiceNow field = Attribute
Create Workflows
Get Test data. You have two options:
- Free plan (Starter) :Download your Test Data from CloudTDMS and upload it into your ServiceNow Dev instance
- Paid plan (Pro or Team) : Create your ServiceNow Storage connection, CloudTDMS will automatically load your test data into linked ServiceNow table.
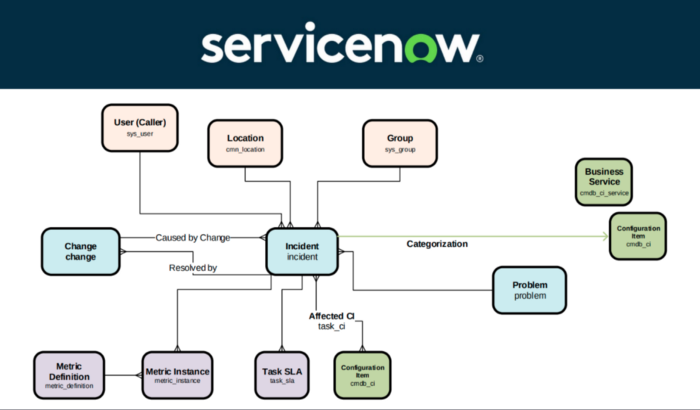
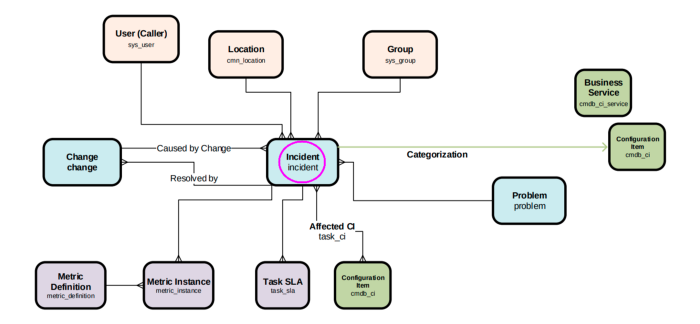
Use Case : Test data for some ServiceNow Data Models
ServiceNow data model is well documented, you need to know tables & fields you need for your test cases. In this use case, we shall address the Incident table (other tables could be added similarly to the same CloudTDMS Application)
Creating Application
An application is a container for a set of streams and each stream is capable of generating data for a single table. Therefore, the applications give us the possibility of generating data in multiple tables. As an example, if we want to generate data for Incident and Problem tables of ServiceNow, we will create an application called ServiceNow and inside this ServiceNow application, we will create two streams: Incident and Problem. So let's create an application first, by going to the Application tab from the dashboard and then click on Create New.
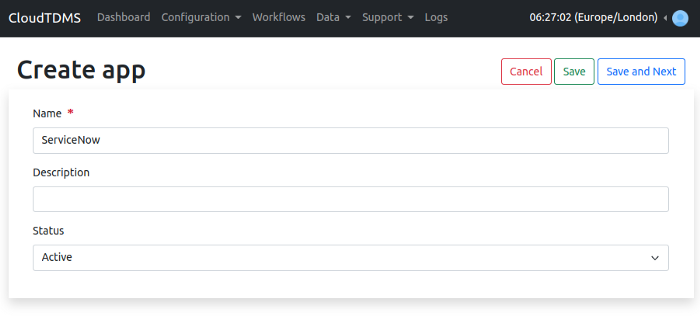
We just need to set a name for the application and click on Save.
Creating Stream
Stream is the definition/metadata of the data that we need to generate. We need to create a stream for each table that we need to generate data for. Now to create streams in our newly created application. We can click on the Streams tab from the dashboard or the navigation bar and then click on the Create Stream button.
We have several options when creating a stream:
- Application: set the same application that we just created.
- Name: set the name for this stream. CloudTDMS sets the name of the output same as the stream name, so if we are uploading data to incident table in ServiceNow, then we must name this stream “incident”.
- Records: the number of records to generate.
- Completeness: the percentage the data that we need to be filled with empty values. We will keep it as 100 because we do not want any fields to be empty in our data.
- Correctness: the percentage the data that we need to be filled with incorrect values. Again we will keep it as 100 because we want all the fields to be correct.
- Geo specific data: if we have any geographical data in our stream and we want to restrict that data to a specific country, then we want set this field. For example, if we have a city column and we want to generate cities from United Kingdom only.
- Status: data is generated only for those streams which are active, so we shall keep this as active.
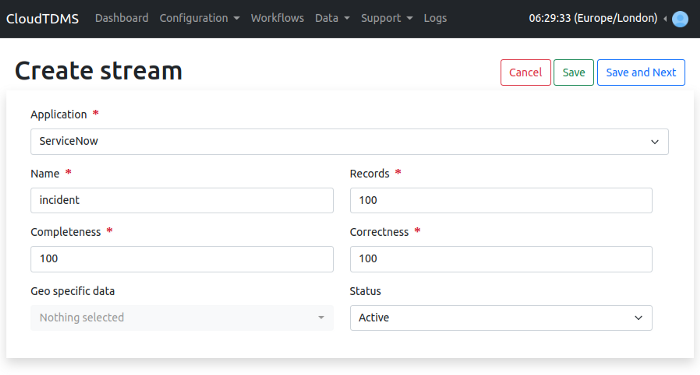
To save the stream, we can click on Save and Next button.
Adding Attributes/Fields
After this we are redirected to the attributes page where we can add attributes to our stream. These are the fields that we want to generate.
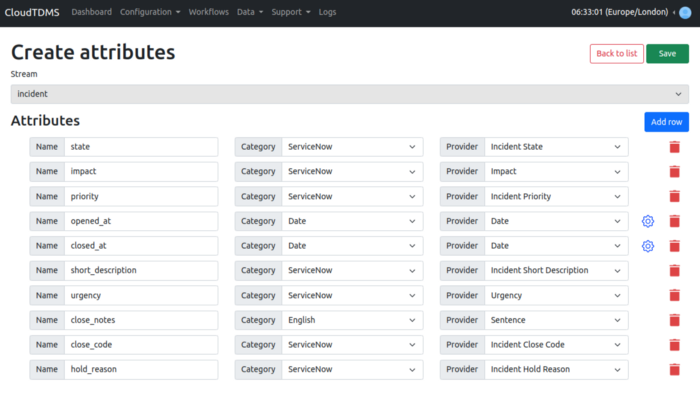
Here in the screenshot, I have provided the metadata for the incident table of ServiceNow.
Note: The opened_at and closed_at fields need to be configured using the gear icon to set the interval for dates and the output format as DD-MM-YYYY
Creating Workflow
Free users (Starter Plan) — Saving data to local storage
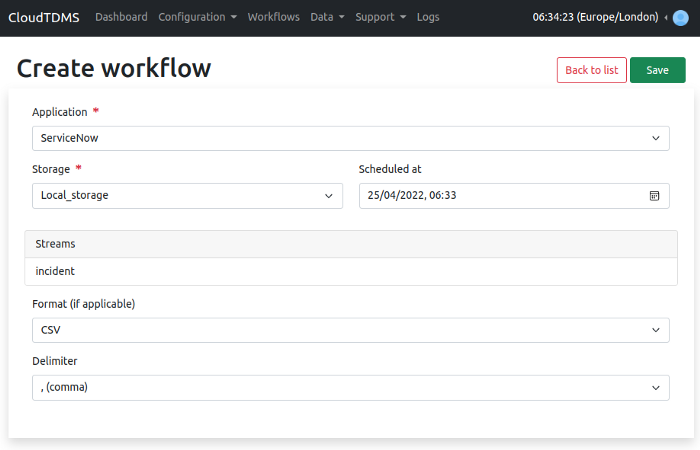
Now everything is set and we are ready for the data to be generated.So how do we do that ? We click on the Workflows tab in the navigation bar and then click on Create New. We need to set the following parameters for the workflow
- Application: the application from the streams of which we want to generate data.
- Storage: where we want to store our data. For free plan (Starter) we can use Local Storage provided by CloudTDMS.
Advanced users (Pro & Team plans) — loading data directly into ServiceNow
Setup Storage
To upload data to our ServiceNow instance, we will first need to create a Storage in CloudTDMS. Go to Storages tab from the dashboard and click on Create Storage. Select ServiceNow from the storage menu and set
- A name for the storage
- The username & password of our ServiceNow instance
- The URL of our ServiceNow instance e.g., dev106982.service-now.com
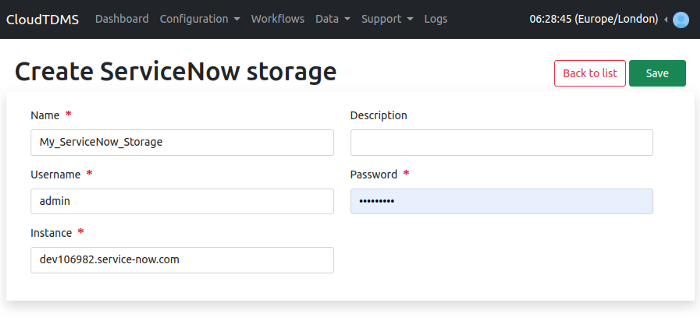
Click on save and make sure the newly created storage is active.
Creating workflow to load data directly into ServiceNow
Go to Workflows tab and click on Create New. Now choose the same application that we created “ServiceNow”. This time we need to change the storage from Local Storage to our newly created storage “My_ServiceNow_Storage”.
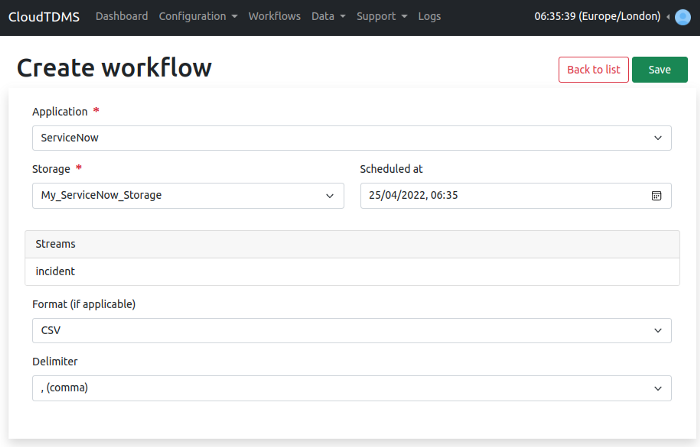
Finally, click on Save. After a couple of seconds, we can see the data uploaded to ServiceNow Incident table.
If by any means CloudTDMS does not load data to our ServiceNow Incident table, the reason could be invalid credentials for ServiceNow, regardless in any case of failure the generated data will be stored in CloudTDMS Local Storage which we can access through the Data Generated tab and then load the generated data into ServiceNow manually. For more information, we can check the logs after the workflow is executed.